


Tea Staining Paper: Instructions
Here’s how to give your papers an aged appearance with just some tea and a paintbrush.
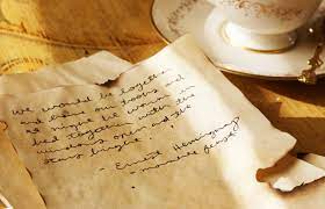
Maybe your history teacher assigned a project, and you want to add an aged look to a document you’re recreating. Or maybe you’ve been planning a pirate-themed scavenger hunt and you need your treasure map to appear ancient. Or you just want your new journal to appear vintage and classy. Whatever the reason, you can achieve this look by staining your paper with some tea!
Step One: Gathering Your Materials
For this project, you’ll need:
- Two bags of black tea (I used a mix of English breakfast and earl grey)
- A mug
- A paintbrush (optional, just using the tea bags works great)
- White paper
- Paper towels
- Optional: Turmeric and coffee grounds/loose tea
Step Two: Steeping the Tea
To make your tea, you’ll need to heat water to near boiling and place your tea bags in the hot water. I like to over-steep the tea so the color will be stronger, but depending on how dark/light you want the paper to be, you can steep the tea for a longer/shorter amount of time.
Step Three: Staining the Paper!
After your tea has steeped, you have a couple of options for actually staining the paper. You can either dip the paper in water, paint the tea on with a paintbrush, or use the tea bags to saturate the parchment in tea. I found the last method to be the most effective.
When you dip the whole sheet of paper into the tea, you risk uneven staining, and the paper falling apart when you try and take it out. Painting the tea using a paintbrush doesn’t saturate the paper as well as using the teabag itself does. When you use the teabag, you get the same control you’d have with a paintbrush and the deeper color of dipping the paper. If you want a darker shade, you can also use brown watercolor over the tea. If you want to add some details, adding turmeric onto the paper while it’s drying can further yellow it, and coffee grounds can further darken it.
Step Four: Drying
After you’ve stained the paper, you lay it out to dry on a paper towel or place it on a cooling rack. I used a cooling rack and it worked great. Just leave your paper overnight, and it will be dry by morning!
And there you have it! A comprehensive guide on tea staining paper. Now go forth, and fake-age as many documents as your heart desires! If you’d like a visual guide to tea staining, I highly recommend this video. If you’d like to read more about arts and crafts, check out this article.
Hi, I'm Mayla! I'm an eighth grader here at CVMS. In my free time I love acting, swimming, watching TV shows and movies, and sleeping. I have one little...